Angular CLI: Your Gateway to Efficient Development
You’ve heard about Angular CLI—the powerful command-line tool that promises to streamline your workflow. But what exactly is it, and how do you install it? Let’s embark on this journey together.
What is Angular CLI and Why Do You Need It?
Angular CLI (Command Line Interface) is like a magic wand for Angular developers. Instead of manually setting up configurations, installing dependencies, and structuring projects, Angular CLI automates these tasks, allowing developers to focus on writing clean, efficient code.
How is Angular CLI Different from a Standard Angular Application?
Without Angular CLI, setting up an Angular project requires manually configuring Webpack, TypeScript, and other dependencies. With Angular CLI, a single command generates a fully structured project, complete with best practices baked in. It also provides commands for building, testing, and deploying applications effortlessly.
Installing Angular CLI on Windows & macOS
Before installing Angular CLI, ensure you have Node.js installed, as it provides npm (Node Package Manager), which is required for installation.
Step 1: Install Node.js
- Visit the official Node.js website and download the latest LTS (Long-Term Support) version.
- Install Node.js:
- Windows: Run the
.msiinstaller and follow the setup wizard. - macOS: Open the
.pkgfile and complete the installation.
- Windows: Run the
- Verify installation by running:
node -v
npm -v
If both commands return version numbers, Node.js and npm are successfully installed.
Step 2: Install Angular CLI
Now, let’s install Angular CLI globally:
npm install -g @angular/cli
The -g flag ensures Angular CLI is available system-wide.
Step 3: Verify Installation
Check if Angular CLI is installed correctly: ng version
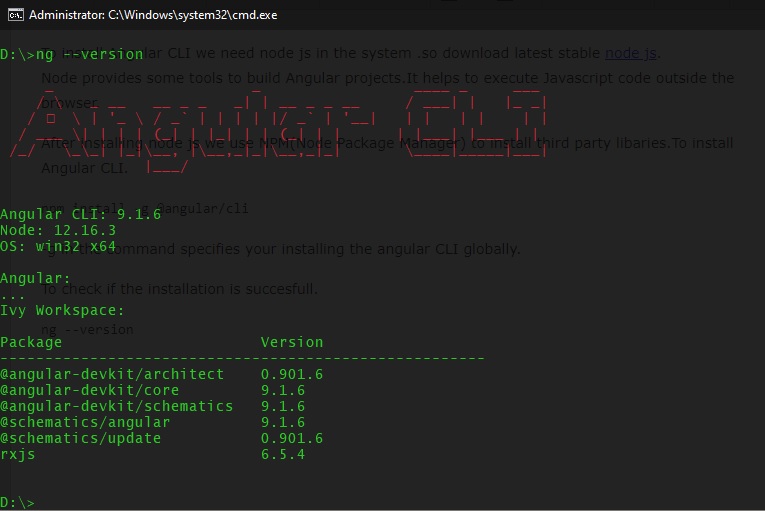
If you see version details, congratulations! You’re ready to create Angular projects.
Step 4: Create a New Angular Project
Navigate to your desired directory and run:
ng new my-angular-app
This command sets up a new Angular project with essential configurations.
Step 5: Run Your Angular Application
Move into your project folder: cd my-angular-app
Start the development server: ng serve
Visit http://localhost:4200/ in your browser to see your application live!
Common Installation Issues & Solutions
Even the smoothest installations can hit roadblocks. Here are some common issues and how to fix them:
1. npm Command Not Found
✅ Solution: Ensure Node.js is installed correctly. If issues persist, reinstall Node.js..
2. Permission Errors While Installing Angular CLI
✅ Solution: Use administrator mode in Windows or sudo in macOS:
sudo npm install -g @angular/cli
3. ‘ng’ Command Not Recognized
✅ Solution: Restart the terminal or manually add npm’s global path:
Windows: Add C:\Users\YourUsername\AppData\Roaming\npm to your system’s PATH.
macOS/Linux: Add export PATH=$PATH:$(npm bin -g) to your .bashrc or .zshrc.
4. Incorrect Node.js Version
✅ Solution: Update Node.js using:
npm install -g n
n latest
Final Thoughts
Angular CLI is a game-changer for developers, simplifying project setup and management. Whether you’re a beginner or an experienced developer, mastering Angular CLI will enhance your workflow and efficiency.
Have you encountered any challenges while installing Angular CLI? Share your experiences in the comments!
